www.acraftersheaven.com.au

Thankyou For stopping by to visit my little crafting corner. I have just started an online business www.acraftersheaven.com.au to sell my cards and I am also selling craft supplies. I love reading all your comments, and am happy to answer any questions.

You can also find me on Facebook here
https://www.facebook.com/ACraftersHeaven

Stay safe,
Tania

Thursday, January 19, 2012

my beautiful family portraits

Hello! I thought I'd share some pictures of our family portraits we had done before xmas by the extraordinarily talented Nilvone Proenca ........My darling hubby Darryl and the beautiful Jake and Hannah. She is local lady based @ North Lakes here is here site: http://www.nilvoneproencaphotography.com.au/


Wednesday, January 18, 2012

Gift book for expectant mum

good afternoon! hope you are all keeping well. This is a gift book that I made up for a good friend I work with having her first baby. When I intially thought "how on earth can I do a card big enough for 30 or more well wishes?" I thought a book would be a great idea. there are 6 pages all embellished to the max .... and the best thing is that everything except for the green DP, matching chipboard animals and crochet flowers are from my stash....even the binding wire is what I cut off from my calendars!. The front image is from nitwit collections. I am really happy with how it has come up. The pages are 600gsm board I got from office works and I have bound it with my zutter.
I hope she likes it as much as you enjoy browsing the pages. Thanks for stopping by XOX Tania
I am entering this into the following challenges:
Simon Say Stamp with spots or stripes
sparkles monthly challenge: new crafting goodies (crochet flowers, DP, chipboard animals)
C.R.A.F.T challenges: Celebrations (new baby)
Moving along with the times: spots and stripes
One stitch at a time: anything goes


Tuesday, January 10, 2012

my first twist easel card for a father


Good evening thanks for dropping by! Tonight I have done a "father" card. This is my first attempt at a twist easel card and I am stoked at how it turned out. When flat the card measures 10.5 x 14.8. To do this size, cut a piece of cardstock 10.5 x 26.4cm. score at 15cm. on the smaller square, you need to score score it on the diagonal ...... so when you open the card flat with the smaller square on the left hand side, you will score from the top left side to the score line in the bottom right side. Then you just cut a top peice of card stock 10.5 x 14.8cm and glue ONLY the left triangular part.
so onto the card....I have popcorn the bear image coloured with prisma colour pencils, I have used Paper inklings DP "dad", ribbon from Craft Queen, a REALLY old fish embellishment (this was a paper clip, which I cut off), some dew drops inside the card as well as buttons and rhinestones. To top off the image, I have used liquid pearls, glamour dust, dimensional magic and stickles. The sentiment inside is a Hero Arts stamp called "special Gifts- Father". you will notice the sentiment is cut on an angle to allow for the card top to sit twisted nicely.

My top Tip : run the edges of your ribbon high over a candle (dont touch the flame)- no more fraying....for organza ribbon hold it a little higher you only need to hold it for a small amount of time or you risk burning it.....you can do this to the edges of your material flowers too!

I am going to enter this card into the following challenges:
One Stitch at a time Challenge- 3 or more embellishments
Top Tip Tuesday- anything goes (2nd entry)
Simon Says Stamp: new something (new technique- my first twist easel card)
PaperTake Weekly: anything goes with the option of a new theme

Monday, January 9, 2012

Our tree Xmas 2011


So sad to say goodbye for another year, but our christmas tree this year has been packed away (wiping away tears!) I dont think we could get another bauble on if we tried LOL. All my outside stars had to be hung high on the tree as a certain kitten kept pulling them off....and my poor train didn't last long either with Gracie stalking it!...oh until next year my dear friend XOX Tania

LOVE YOU VALENTINES SIDE STEP CARDS


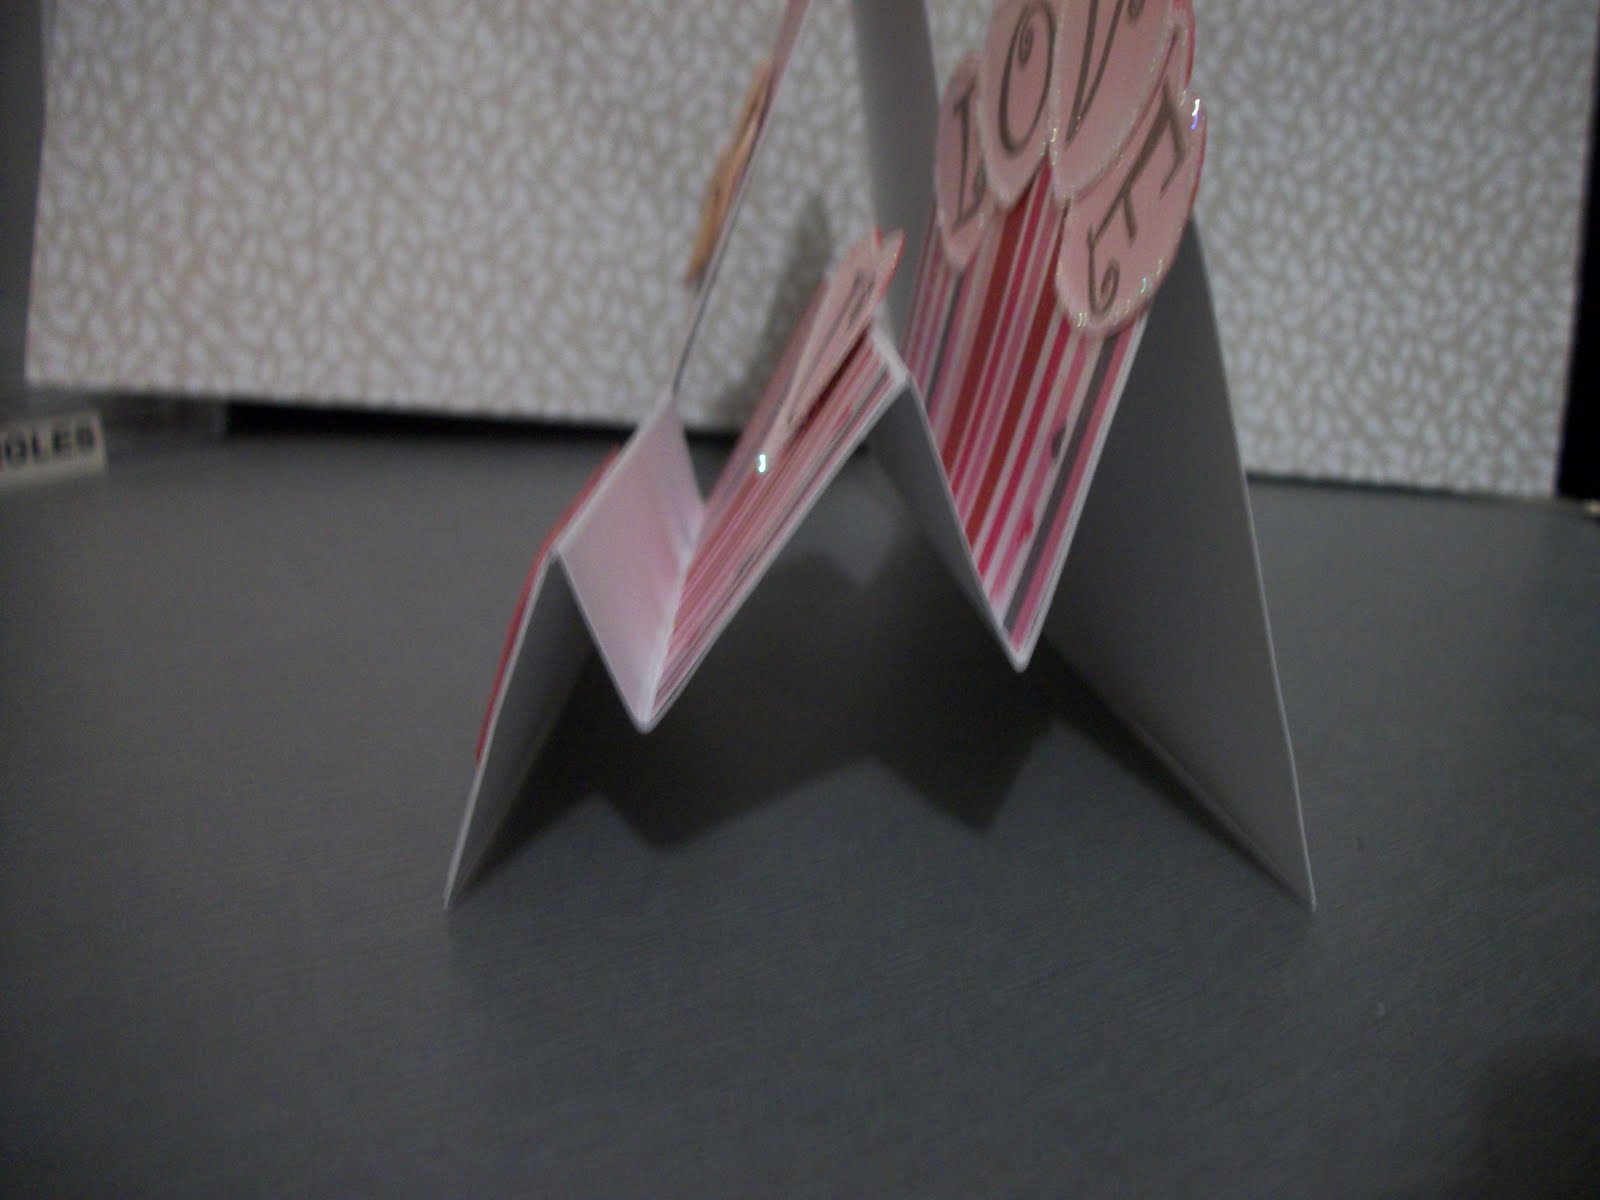
Good evening and thanks for visiting my blog. I have done a couple of valentines cards using a side step card. I do mine a little different to others- basically because I dont know the right measurements and I can make two of these cards out of one A4 sheet of cardstock. I have added a picture of a side view and you can see what I mean....its not a big issue for me as my steps do not hold a lot of weight and I get a deep front step so I can put a nice big sentiment there. I love this paper from Little Yellow Bicycle named Sweet Stripes. It has a beautiful glimmer to it so you dont really need to dress it up much. The forever friends sticker and sentiment were freebies on the front of a Do-Crafts magazine last year. I punched the hearts out using a creative memories punch and have embossed the letters using an Inkadinkado set called Curly Q alphabet. I used versa mark stamp pad and "mostly Mink" colour embossing powder by Alison Ellis Design. Hope you like it :0) XOX Tania

Saturday, January 7, 2012

Lawnton markets 14 Jan 2012

For the lovely locals...I will be at the Lawnton Markets next Saturday 14 January 2012. Love to see you there- pop in and say hi! XOX Tania

never ending boys birthday card


Hi thanks for stopping by today. I thought I would get in early for my sons birthday with this never ending card. I was looking through my drawers yesterday and found all sorts of goodies that I haven't used in a LONG time.....including my poor neglected prisma pencils :0( I found I have a huge variety of micro beads- some date back to when I was in school some 18 years ago! For this card I have used many applications- black embossed balloons, dimensional magic, liquid pearls, micro beads, sparkly fluff, glamour dust , and for the large cupcake I run some scrap cardstock through a crimping machine using my round spellbinder nestie for the top icing part and cherry. I hope he likes it...as a rule of thumb he likes anything he can fiddle with so this card will be sure to keep him busy. I have used various sets of stamps- inkadinkado- birthday sentiments; craft affair's- "Life is sweet" and "Love bug" (from the love bug set, I cut the "love bug" wording from a frame and just used the circular scallop frame). I also used a little "happy birthday" stamp from a popcorn the bear set- I have cut all these up and mounted them, so dont know what belongs to what set :0(. The design paper is an "adorn it" page called "vintage Market".

Thanks for stopping by XOX Tania

I would like to enter this card into the following challenges:

Southern Girls Challenge: Show us your sparkle (everywhere!)

Crafty creations challenge: heat embossing (black balloons)

Sparkles forum challenges: Anything but Xmas (birthday card)

Friday, January 6, 2012

Tutorial on Tri Fold Card using cm not inches


hello thanks for stopping by tonight. I thought I would share a template of how I do my tri fold cards. Many I have seen are in inches, but in Australia we use cm's so I have done up a quick drawing above of your cut lines and measurements.
Take a piece of bazzil and cut it down to 30cm by 30 cm. Cut this in half giving you two 15cm x 30cm cards. I like to make my cuts first as I dont like to score throught the "T" piece. so (at about the 10cm and 20cm mark) measure down 4cm (these are your guide points for your cutting line)....line those points up and cut from 5cm to 25cm ....turn your card around and do the same for the other side. get your scorpal (or scoring tool) out and scor at the 5cm mark- BUT ONLYscor down to the cuts! then score at the 10cm and 20cm going completely from top to bottom. again, with the last scor (at 25cm), you are only going to scor to the cuts. Fold along the scors and viola ....a tri fold card!

I am not the best person at describing things, but hopefully by looking the the picture you will make sense of what I mean! Please feel free to message me for anything you dont understand. Thansk for popping by XOX Tania