A couple more cards I have done. The top sentiment is from a couple of different stamp sets and the bottom sentiment is a whimsy stamp set. This is discontinued and I have ONE set available in store. the elephant is a Kassazz stamp from their new catalogue. the dies used on both the cards are Joy craft dies. Flowers are again Wild Orchid crafts that I have in store and the little pink butterflies are from A Mothers Art available in store as well. please drop by and have a look- my prices are very reasonable and although postage is charged at a flat satchel rate I do refund excess postage :-)
www.acraftersheaven.com.au
Thankyou For stopping by to visit my little crafting corner. I have just started an online business www.acraftersheaven.com.au to sell my cards and I am also selling craft supplies. I love reading all your comments, and am happy to answer any questions.
You can also find me on Facebook here
https://www.facebook.com/ACraftersHeaven
Stay safe,
Tania
Stay safe,
Tania
Showing posts with label whimsy rubber stamps. Show all posts
Wednesday, October 12, 2016
Whimsy stamp Hazel and Penny Black stamp Buzz in the Air
Oh Boy! my absence has been so long! I didn't realise I hadn't blogged for so long! I have been busy making cards and will post some of them for you to see. I have been slack and not taken note of the copic colours I have used when colouring. My online store is growing www.acraftersheaven.com.au and I am trying to source new and exciting products. I have recently stocked products from Whimsy stamps and am just looking through the Penny Black wholesale site to bring you some of their gorgeous products! For now here are a couple of my more recent cards I have done.
Below is Hazel by Whimsy stamps. I have used flowers by Wild orchids Crafts and Blue Embossing Enamel. I made the web by twisting together some white wrapped wire... all available to buy here. I used cheesecloth under the layers that I bought at Spotlight.
The next card was supposed to be a thank you card for my husbands uni facilitator when he finished his placement. He forgot to take it so now have it available to buy :-/ I used a Penny Black stamp called Buzz in the Air. I will endeavour to add this to the shop in the near future :-) The Sentiment is a discontinued Whimsy set called mini chalkboard scripture sentiments. flowers are from my shop. the die used is a Joy Crafts die called Lacey Rectangle Frame.
Tuesday, October 21, 2014
Saturated Canary Ava
Good morning, thanks for stopping by. Well I have been super busy lately with work and kids... BUT most of my time has been spent setting up a new business!!! I have an online shop now www.acraftersheaven.com.au
would be lovely for you to drop by and have a look at what I have. I am just starting, so I don't have much up there yet, but stay tuned, I have some awesome products coming!
So onto my card. I have used the lovely Ava by Saturated Canary. This was a special order for a customer who wanted a purple and gold 40th birthday card. The gorgeous parasol die cut is a tattered lace die (which I have coming for my shop). flowers are Wild Orchid Crafts. The inside die is a whimsy called Dainty Notables 4. The verse is Raindrop echo's also by Whimsy. Butterflies are acetate glitter ones made by me :-)
Copic Colors used:
E 000, 21, 30, 31, 33
Y 000, 21, 23
V 01, 04, 06, 09
B 00, 32, 34, 39
W 1, 3, 5, 7
Thanks for stopping by
stay safe XOX Tania
Saturday, April 26, 2014
Saturated Canary and whimsy cards
Hi there, thanks for stopping by. I have a few more cards to share with you. The first is a whimsy digi image called Bird Swing. dies are spellbinders, joy crafts, memory box, crafty individuals and magnolia. Paper is pion design. Flowers are wild orchid crafts.
Copics:
YR 0000, 000, 01, 12, 18
Y 38
B 000, 00, 91, 95
BG 0000, 000
E 21, 25, 31
YG 03, 63
C 0, 1, 3
R 00, 81, 83, 89
A saturated Canary image called Lolita (now discontinued). Dies LaLa Land and magnolia. Flowers are Wild Orchid Crafts. Charm form Nini's Things off facebook. Dp is Kaiser craft- Madame Boutique.
Copics:
W 0, 3, 5
YR 000, 12, 15, 18
V 01, 09
Y 13
YG 03, 63
B 000, 91, 93, 95, 99
BG 01, 05
E 000, 00, 11, 13, 21, 30, 31, 40, 42, 43
One off the free CD on the Complete Cardmaking called Raining Love. DP by Bo Bunny- Primrose Collection. Dies are LaLa Lands, Tim Holtz, Joy Crafts. Flowers are Wild Orchid Crafts.
Copic:
B 00, 12
E 000, 00, 13, 15, 18, 19, 21, 95
YR 0000, 000, 00
R 83
RV 95
C 0, 1, 3
Its mothers day soon and heres a card I made for the market. Dies are Cheery Lynn, Magnolia, Spellbinders. Flowers and the little resin butterfly are from Wild Orchid Crafts.
Copics:
E 000, 00, 21, 53, 57, 59, 95
C 0, 1, 3
YG 03
G 05
YR 000, 00, 15
R 20
RV 95
Thanks for stopping by. Stay Safe. XOX Tania
Tuesday, March 18, 2014
Top Tip Tuesday Guest Designer male card Spitfire Delicious Doodles
Good morning! Thanks for stopping by. I was lucky to be picked as Top Tipper over at Top Tip Tuesday a few weeks ago, and was asked to be guest designer for their challenge this week. The challenge is to use metal faux or real! So I have used some metal charms and wait for it... I have a done a male card. I KNOW! shock horror lol!!! I have used "spitfire" from Delicious Doodles, and didnt have to colour it at all- super simple! The sentiment is a combination using a Popcorn bear sentiment and a Whimsy notables 2 outer frame stamp and cut with the notables 2 die. I used DP from two Prima pads- called "Cartographer" and "engraver". Die cuts are using magnolia swirl die, Cheery Lynn Gears die and Heartfelt Creations Layered Elegant Swirl die. The charms are from Nini's Things on facebook.
Here's my top tip for the challenge: When distressing edges of your cardstock, ink the edges and distress whilst
still wet. Place the edge of what you are going to distress onto your table
leaving about 1cm hanging over the edge of your table. Working from the centre
of your cardstock and out to the corner, distress using your distressing tool.
This way, your corners stay intact, and your paper will not get creases in it.
The slight wetness left by the ink helps it “puff”up.
So now its your turn.... Pop over to Top Tip Tuesday and show us your metal! and while you're there, why not leave a tip to help us all craft a little easier and you could be the next Guest Designer?!
Thanks for stopping by. Stay Safe XOX Tania
Tuesday, May 28, 2013
Redonkadoodles soccer Football girl
Good afternoon, thanks for dropping by. Its been a cold and rainy day here in Brisbane, and I have had the day off work... what better reason to lock myself in my craft room I say :-) This is a card I did a couple of weeks ago for a lady who wanted a tomboy card for her grand daughter... a hard ask for me, who loves nothing less than splashing around loads of flowers and butterflies. The main thing is that she was happy with what I made, and I rather surprised myself!!!! not a flower or butterfly in sight!
The image is from Redonkadoodles (the old Redonkulous Designs) called Soccer football girl. I coloured her in the childs favourite colours- red and green. The black and white polka dot paper is velveteen to touch and came from a Kaiser Craft pad called Chapter One. The green chequered paper is from a We Are Memory Keepers called Baby Mine. I made the soccer ball with spellbinders Octagon and small circle nesties. The banner stamp is a whimsy set. the big brad, candle brad, ribbon and twine is from my ever growing stash.
Copic colours I used were:
YG 03, 63, 67
G 99
R 20, 22, 29, 85
E 000, 00, 04, 11, 21, 25, 29
W 1, 5
N 1, 4, 6
I would like to enter in to the following challenges:
Allsorts Challenge: Birthday
Creatalicious Challenge: For the girls
Make it Monday: anything goes
Thanks for stopping by, Stay Safe. XOX Tania
Monday, March 4, 2013
Magnolia Secretive Tilda and some exciting news
Good morning! WOW it has been forever since I've posted here! I have been super busy the last couple of months, but the best achievement I have made is falling pregnant with my third baby (second pregnancy)!!! We are so super excited and so are the kids.... due on the 1st of September, I am 14 weeks pregnant :-)
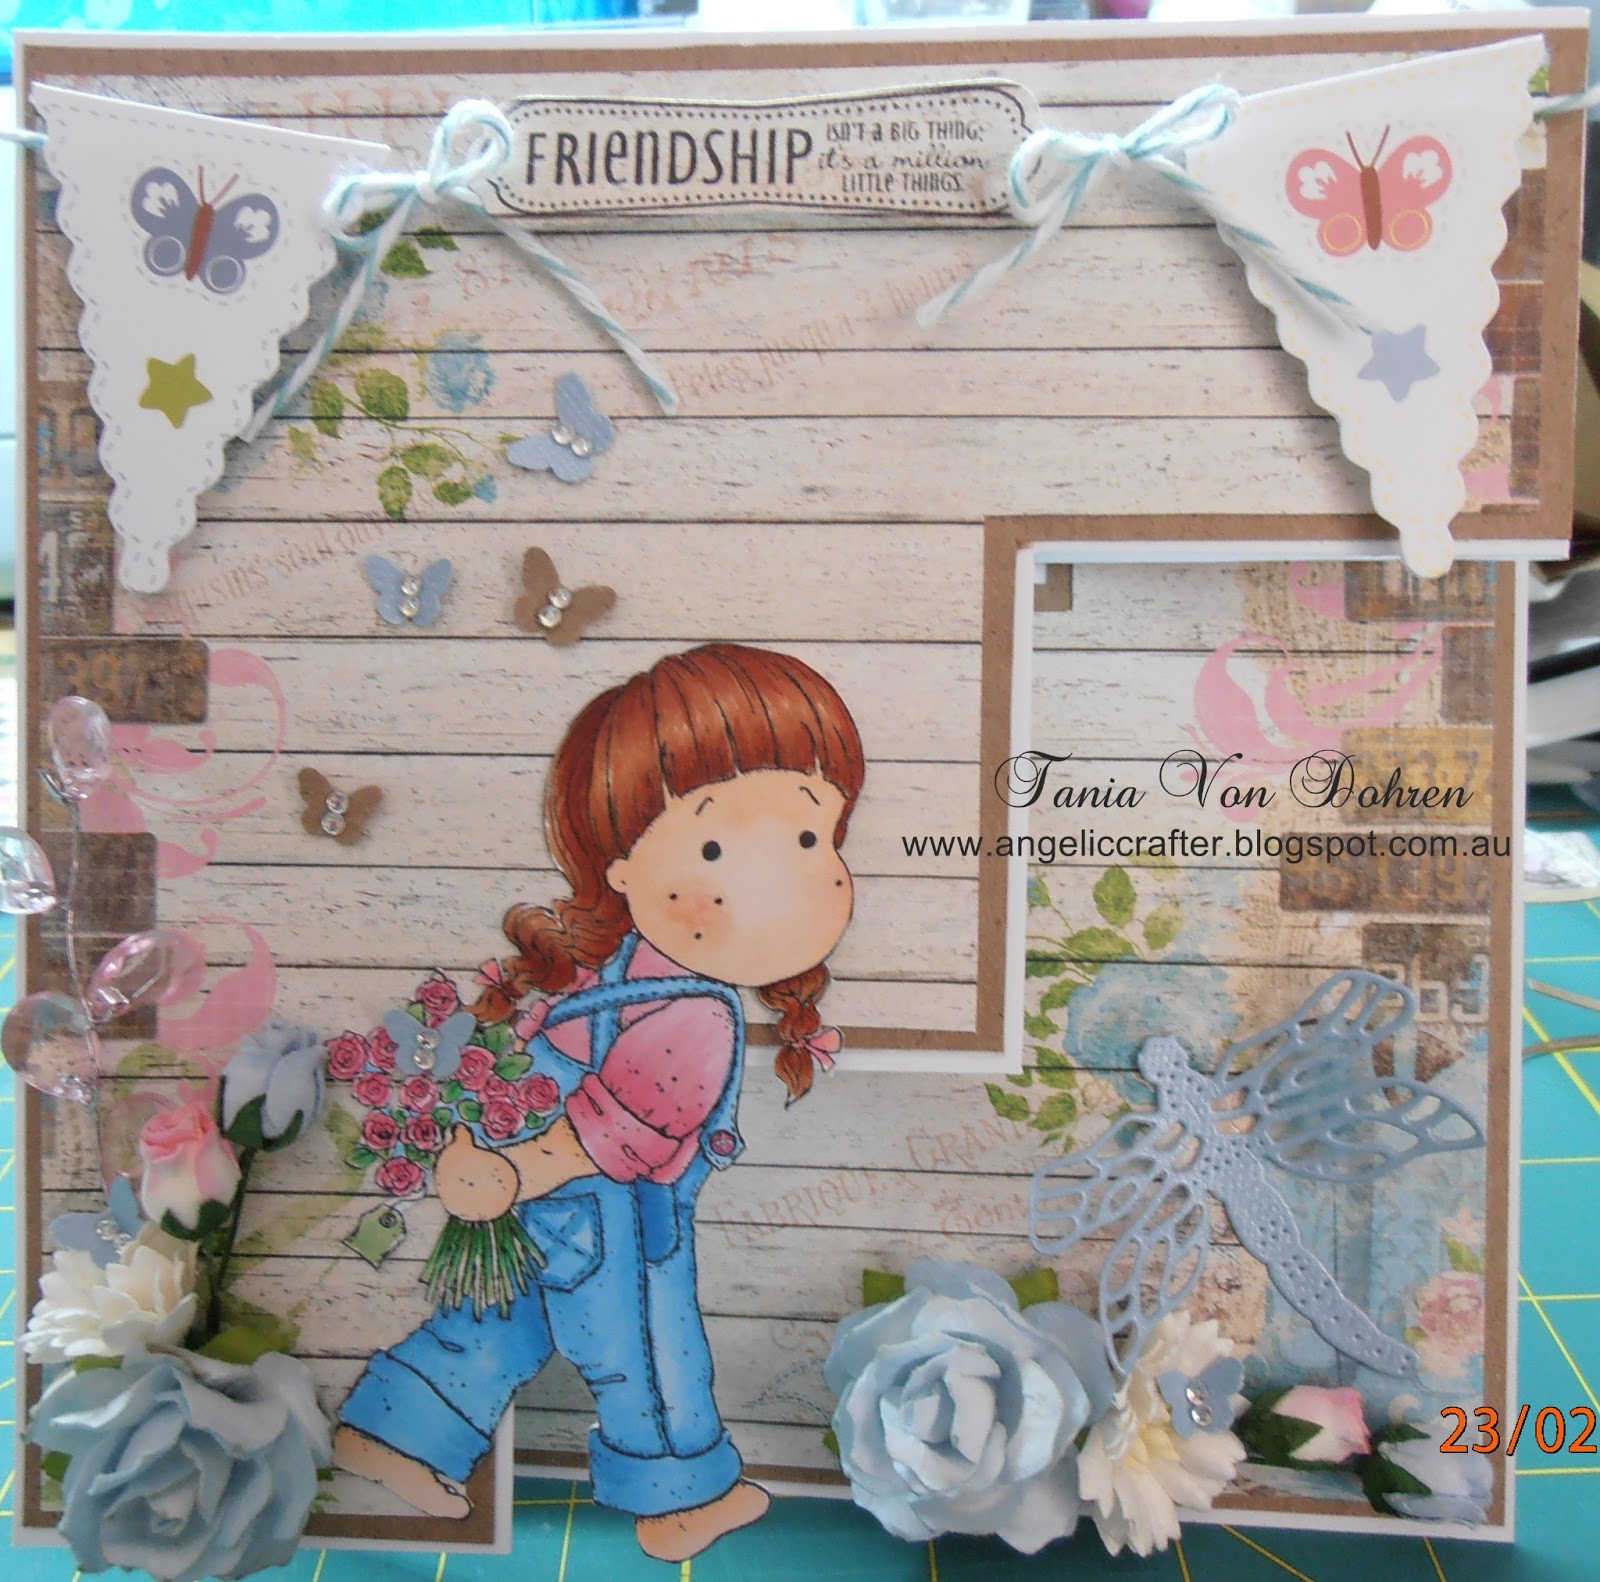
I have been working on a couple of cards... this one is a pull out step card using a magnolia image called Secretive Tilda. I like this design of card because you only use the one design paper. I have used sheets from a Bo Bunning pad called Prairie Chic Collection. The flowers and chandeliers are WOC, the dragonfly is cut using a Cheery Lynn die. The little butterflies are the punch outs from my Martha Stewart pop up butterfly edger. The friendship stamp is from whimsy cut with the coordinating die. the little banners are from a sheet of die cuts (sorry, not sure of brand). I have tied off the banner with some divine twine
Hope you like it :-) Check out Southern Girls Challenge this week, they are asking to see banners or pennants on your creations. Hope I have inspired some creativity in you. Stay safe XOX Tania
I would like to enter in to the following challenges:
Wild Orchid Challenge: use daisies (I have used cosmos daisies)
Crafts and Me Challenges: use dies or punches
CMC Challenge: Anything goes
Tuesday, January 8, 2013
Magnolia Tilda Lace Jeans
Good evening, thanks for stopping by. Just a quick post tonight with a card using my favourite magnolia stamp- Tilda in lace Jeans. Isn't she adorable. When the card is standing up on the table, it looks like Tilda is peeking out of the bottom. I have used magnolia and Cheery Lynn dies. The banner stamps are from Whimsy. Flowers and crystal chandeliers are from Wild Orchid Crafts. Paper is by My Memories No. 151844. Twine for the banner is Divine Twine.
I would like to enter in to the following challenges:
Diva's by Design: Anything Goes
Wednesday's Creative Inspirations: Celebration
CMC Copic Challenge: Pastel Colours
Dream Valley: Anything Goes
Thankyou for stopping by. Stay Safe XOX Tania
Tuesday, October 30, 2012
Redonkulous wedding card
Good afternoon thanks for stopping by :0) I have a couple of wedding cards to share tonight, its seems to be the season for nuptials lately. This is Redonkulous design called wedding couple. the sentiment is a whimsy stamp and is cut using a circle / scallop nestie. I tried something a little different with the girl... trying a bit darker skin... it looks ok, but I will definately have to invest in appropriate copic colours thats for sure! I hand glued each individual pearl on for the swirl, and used bead caps flor the little silver flowers- topped with a pearl. both from my stash. Lace is also from my stash that I get from Arnolds at Rothwell.
I followed the sketch over sketch and stash. The papers I used are digi papers from Nitwits- they have some gorgeous new designs out- so pop over and have a look. I got a new corner die from ebay by Cheery Lynn called Deco Lace Corner die- isnt it cute?! Flowers are of course WOC.
I would like to entrer in to the following challenges:
Sketch and stash: sketch by Kevin
CRAFT challenge: recipe- 1 image, 2 papers, 2 flowers and 1 sentiment
Fussy and Fancy: anything Goes
Thanks for stopping by, Stay Safe XOX Tania
Tuesday, October 23, 2012
Whimsy Elisabeth Bell Sun Kissed
Hello!!! thanks for stopping by tonight. This is another stamp from my spree at Whimsy Stamps the other week... a lovely image by Elisabeth Bell called Sun Kissed.. keep checking in here as it is currently sold out, but hopefully they will restock soon :-) I have used paper from prima pad called Sun kiss... same name- a perfect complimetary paper!!! The yellow check paper is from a We R Memory Keepers pad called Baby Mine. I have followed the sketch over at Sunday Sketch and Stamp and the flowers are WOC of course! The brads and seniment are both Kaiser Craft.
I would like to enter in to the following challenges:
Sunday Sketch and Stamp: sketch
Colour Me Creative: A touch of red
Thansk for stopping by, Stay Safe XOX Tania
Elisabeth Bell's Li'l Sweet Tweeter
Good morning, thanks for stoppping by. I did this card a while ago, but forgot to upload it. The image is by the beautiful Elisabeth Bell called Li'l Sweet Tweeter for the little cottage cuties collection by Whimsy stamps. You can get this stamp, plus all the others here. If you cant tell... I love Elisabeth Bell's images (to the point of stalking lol!!!)'and this cutie was so fun to colour up. I love the little bird in the birdcage.. I hope I have done the image jutice with my colouring skills (which I am still working on). I have ued paper from a prima pad called Fairy Belle. The butterfly is cut from a Cheery Lynn die. Flowers are WOC of course!!
I would like to enter this card into the following challenges:
Wild orchid crafts: gold or silver (silver ribbon slider and silver birdcage stand)
Thanks for taking the time to stop by, I love hearing your comments. Stay Safe XOX Tania
Monday, September 24, 2012
Magnolia Bride and Bridesmaid
DONT FORGET TO ENTER MY CANDY CELEBRATING 50 FOLLOWERS... CLICK ON THE PICTURE ABOVE AND LEAVE A COMMENT
Good evening thanks for stopping by! I have a beautiful magnolia image I have coloured here with my copics called Bride and Bridesmaid. Thought I would give white on white a go. I have followed a sketch from Sunday Sketch and Stamp It is really difficult to see the elements of this layout because the white blends in, but I HAVE followed the sketch trust me LOL!!! Lots of things going on here: I have used sentiments from Whimsy called Celebration Circle pennants, cut with my scallop circle die, embossing folders from cuttlebug (hearts) and couture creations (walrus and carpenter). The butterfly is from Cheery Lynn and the flowers are Kaisercraft and WOC. Brads are Kaiser craft. Ribbon and lace from stash. I have splashed around some stickles, liquid pearls, glimmer mist (see note a bit further down) and some dimension magic. The white glitter twirls in the flowers I bought from the local $2 shop.
I would like to enter into the following challenges:
Sunday Sketch and Stamp: sketch
Dream valley: Celebrations
Divas by Design: Lovely Layers (minimum 4 layers)
Simon Says Stamp: Emboss It
Magnolia Down Under: White on White
I took the pic below to show the glimmer of the dress. I found that spritzing with glimmer mist got everywhere EXCEPT where I want it, so I get a water brush and dip the brush part in my glimmer mist and paint it on- goes on perfectly with one stroke! DONT fill the pen reservoir with your glimmer liquid- the fine glimmer particles get caught in the nib! here is a pic of what I am talking about (I bought mine from Riot art store)
Pretty plain and simple inside for a message. Thanks for stopping by. Stay Safe XOX Tania.
Wednesday, September 12, 2012
Krista Smith Pricillapie friendship card
Good morning thanks for stopping
by! Well, the school fete is finally here .... Saturday is the BIG
day... I have been busy making cards as I am having a little stall
there... so I have three days to get as much done as I can! I have
made a card using Krista Smith's beautiful Pricillapie. I have coloured her with copics. I followed a sketch from Crafting Life's Pieces.
I
have used papers from my Prima pad called Rondelle... I'm sooo glad I
bought two at the time because I LOVE this pad!! Flowers are from Wild orchid Crafts. I have glued some dew drops around from my stash. Hat pin I made myself. Sentiment outside was a freebie on a magazine here in Oz, and the inside is a Whimsy notables 4 sentiments.
I would like to enter into the following challenges:
Crafting Life's Pieces: Sketch
Saturated Canary: Dotty
Wild Orchid Challenge: Layers
Allsorts Challenge: Layers
Thanks for stopping by Stay Safe XOX Tania
Monday, September 10, 2012
Redonkulous bride wedding card
Good morning, Today I have a wedding card made from a digi image by Redonkulous Designs called wedding bliss. I have not used any DP for this card, rather I have embossed white card using a couture embossing folder called Walrus and Carpenter. I got it a couple of years ago and dont remember where I got it from, but what I love about these folders is that ther are a little bigger than cuttlebug and sizzix embosing folders. BUT I woud love for a company to make embossing folders 14.5-15cm wide (the width of the bigsot clear pads) so you can emboss the whole base of a square card.... now wouldn't that be nice?? Flowers are WOC, the tag is from a Whimsy Notables 2 die as is the stamped frame... "congratulations" is from a clear sentiments set by Inkadinkado called Greetings. The swirl is a My Favourite things die.
The inside sentiment is from a stampin up stamp- not sure of which set. cut using spellbinders labels 10.
Thanks for stopping by. Stay Safe XOX Tania
Sunday, September 9, 2012
Elisabeth Bell "wishes" birthday card
Hello! Another of my new Elisabeth Bell images called Wishes. I have coloured her up with copics. The banners are from Whimsy Stamps called celebration circle pennants. You can buy the dies to cut them out and layer them with frilly bases, but my bank account was looking a bit drab LOL! SO.. I used my spellbinder circle cutter and the smallest of the spellbinder lacey circles for the base.... works for me :0) my ribbon is from my stash, as is the ribbon slider (I got these in a big lot and sell them at the markets (when I go) for 75c each- I also have the circle diamonte sliders too). I am trying to get enough stuff collected to open an internet store and try and sell things as cheap as I can :0) The moonstone brads are WOC I got last year (I bought something like ten jars in one hit to save on postage... but am working my way through them). The flowers are also WOC, but I didnt have purple ones, so I spritzed my beige ones with glimmer mist, dabbing a darker purple on the edges.
HINT.... I tend to buy white or cream flowers so I can colour match them to my theme and it limits the amount of space I need with different colours of flowers. I do whole colours by misting them with glimmer mist, but if you just want to highlight the edges of your flowers, spritz with a clear glimmer mist like marshmallow or pearl.... then rather than misting the darker colour, remove the lid and using the straw (that connects to the lid part), dab ever so lightly onto the edges of your flowers... by moistening the flowers with the clear mist first, that allows the darker colour to kind of wick up the flower petal adding a realistic touch :0)
The papers are from my scrap box and are both Magnolia.
I would like to enter in the following challenges:
Delicious Doodles: celebration (Birthday)
Dream Valley Challenge: Something Old (flowers, ribbon, paper) Something New (image & banner stamps)
Fairy-tale Challenge: Metal (ribbon slider)
Subscribe to:
Posts (Atom)