www.acraftersheaven.com.au

Thankyou For stopping by to visit my little crafting corner. I have just started an online business www.acraftersheaven.com.au to sell my cards and I am also selling craft supplies. I love reading all your comments, and am happy to answer any questions.

You can also find me on Facebook here
https://www.facebook.com/ACraftersHeaven

Stay safe,
Tania

Friday, November 22, 2013

Saturated Canary Charming


Good afternoon. Thanks for stopping by. Today I have a card using a Saturated Canary image called Charming.  I have the rubber stamp for this lady, but I do believe you can get her as a digi too!  I have used paper from the Kaiser craft pad called Madame Boutique.  I have used flowers from Wild Orchid Crafts and die cut a swirl using magnolia die. Usual acetate butterfly and diamontes splashed around for bling. This image was subject in a class I did with Alyce of Kit and Clowder, and I have worked on my folds, but still practicing, I think she has come up well without Alyce guiding me :-)


Copic colours used:
R 11, 20, 59
RV 34
B 91, 93, 95, 97, 99
E 000, 00, 04, 11, 21, 43, 50, 53, 57


Hope you like my card for today.  working on lots more for my xmas markets coming up soon.

Take Care, stay safe. XOX Tania

Thursday, November 21, 2013

Whimsy's Fluffy on Lily criss cross card


Hi There! thanks for stopping by.  Here is another criss cross card, I made a whole stack in one sitting and have been decorating them over the last couple of days.  I have so many wonderful stamps, and some I dont think have seen ink, and this is one of them! I dont know why I haven't ink this one up as he is super cute !! He is a digi image called Fluffy on Lily by Whimsy stamps. I used Kaiser craft pad "Lavender Haze" paper.  Flowers from Wild Orchid Crafts.  Butterfly is one of my acetate ones and I made the charm using pearls and beads.  Image is cut with spellbinders circle die and matted with spellbinders Lacey circles die.


Copic colours I used are:
N 0, 1, 4
100
BV 0000, 000, 00, 02, 04, 08
W 5
R 20
YG 03, 63, 67
G 99


A super quick  post, dont want to bore you with my dribblings hehe!!! Take care, Stay safe
XOX Tania


Tuesday, November 19, 2013

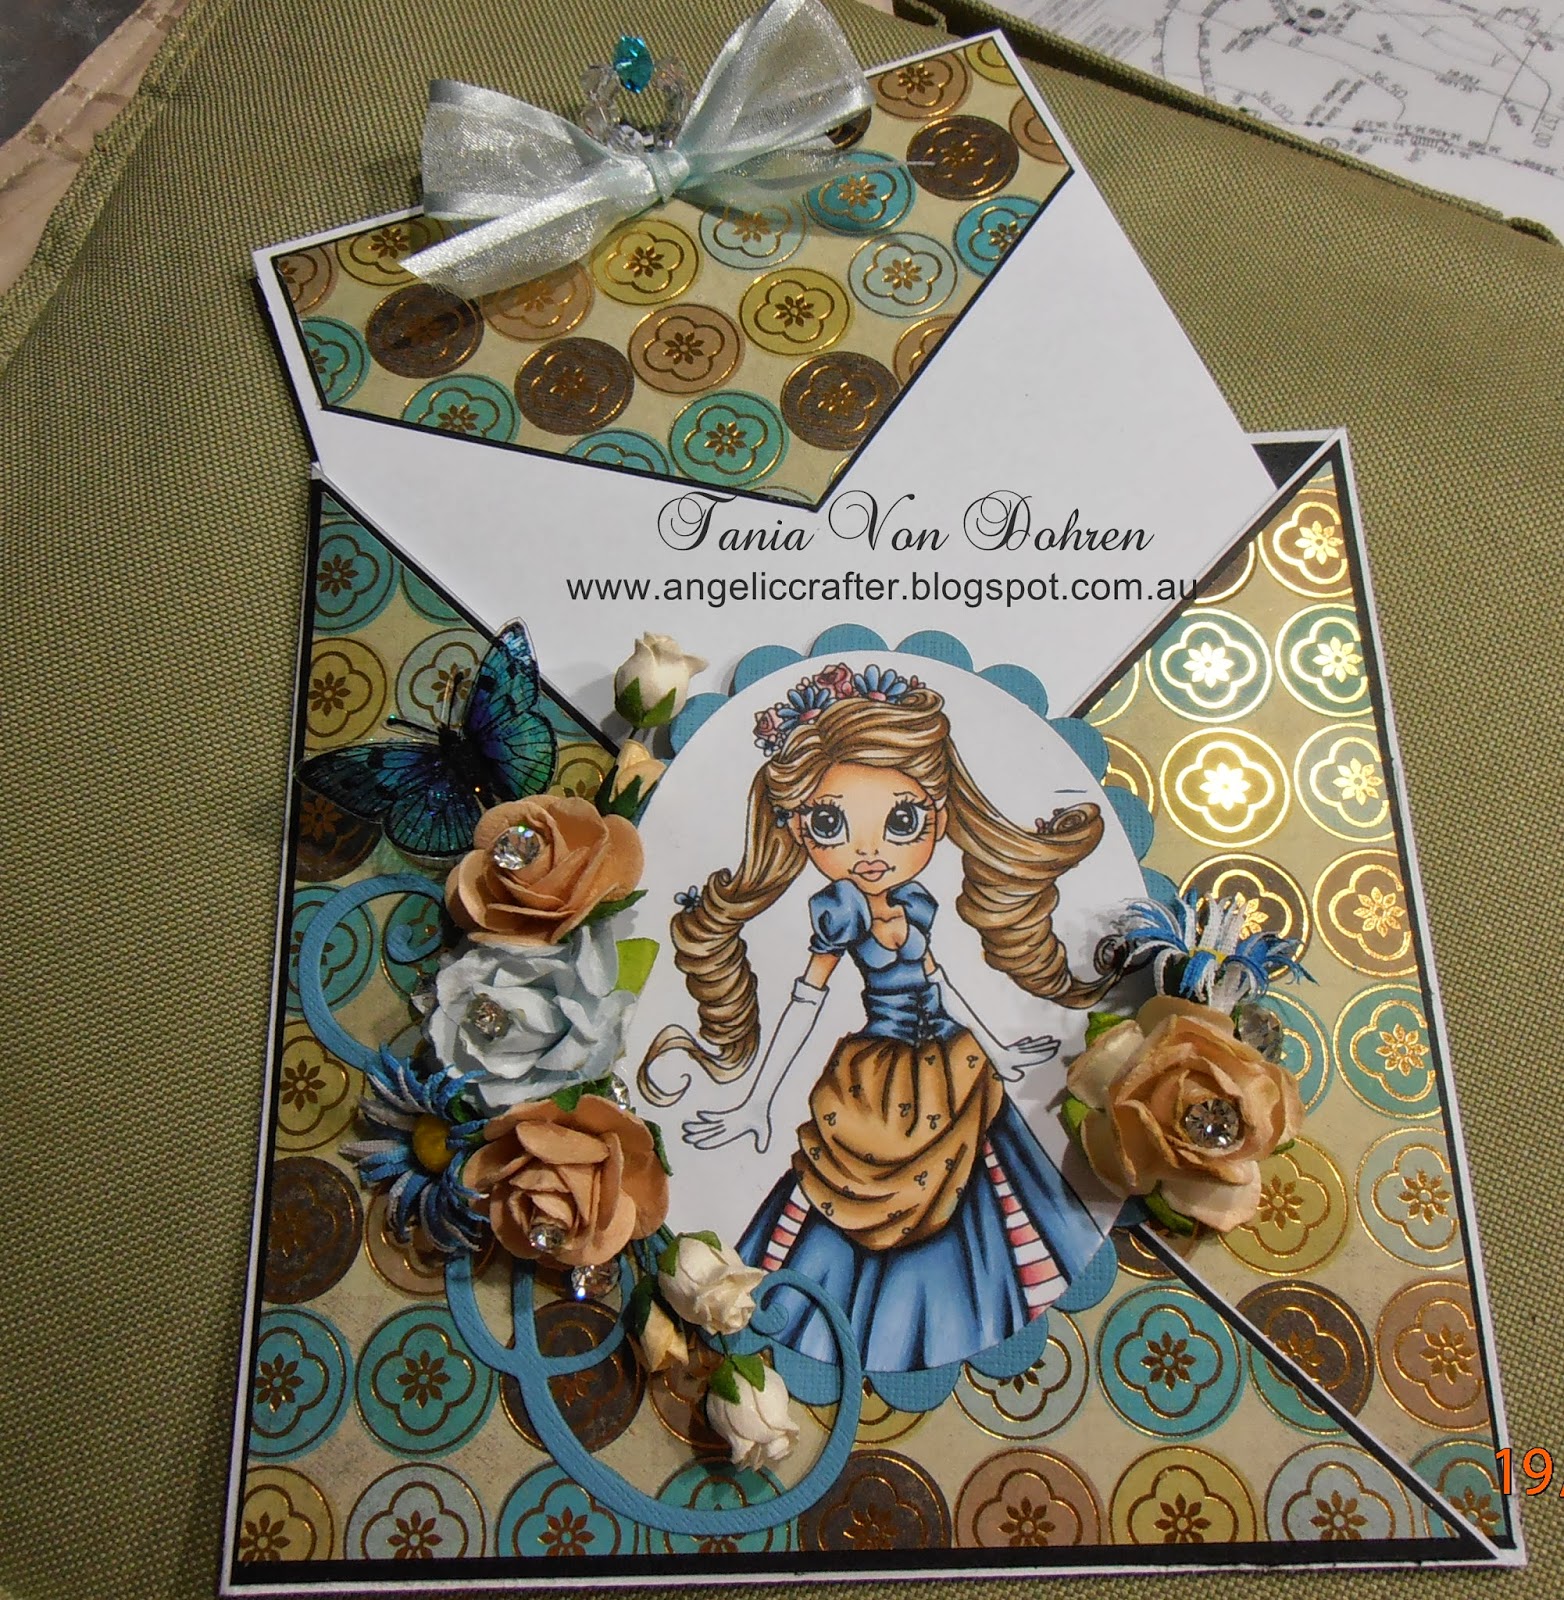
Criss Cross Card using Magnolia's Japanese Tilda


Hello! Boy it has been a long time since I've had time to do crafting and blogging, but have been able to get a few of these criss cross cards done.  something a little different than the standard open out card- I got the instructions from the talented Bev Rochester here.  I coloured up Magnolia's Japanese Tilda and have been practicing my colouring with the help of classes from Alyce of Kit and Clowder. Still not the best, but getting there :-)  I glued a big bow for the pull out part of the card.  the beads are threaded on to a piece of tiger wire which I threaded through the bow and secured with a silver crimp. Paper is from Bo Bunny's Serenity pad. The swirl is a magnolia die cut. Flowers and the cute resin butterflies are from Wild Orchid Crafts. 


Copic colours used:
YG 03, 63, 67
G 09, 99
Y 00
R 20, 27, 39, 59
N 1
BV 23, 25, 29
E 000, 00, 11, 21, 34


Thanks for stopping by, hope to get more cards uploaded over the next couple of days.
Stay safe XOX Tania


Wednesday, September 11, 2013

some various swing cards


Hi there! This is a quick post, basically because these cards are quick to make.  There is no colouring involved, but the embellishments make the cards exquisite.  I thought I would post them just purely to give you some ideas on different things that you can put on your cards.  I alter a lot of things, like cutting the ring off charms (as seen with the dinosaur in the pebbles near the fence) or the back notch of buttons and the split pins off brads. I hope you can find some ideas here.  By inking the edge of  straight cuts and using some frantage or different coloured embossing powders you can transform a simple card topper with a saying. 

Thanks for stopping by, Stay safe XOX Tania


Forever Friends Bear with large Present


Good morning. thanks for stopping by.  Today I have another swing card, this time using a Forever friends stamp of bear with large gift.  It came in a set of wood mounted stamps a couple of years ago and is super cute!  I did not write down the colours I used. The DP is from a Kaisercraft pad called True Romance.  The flowers are Wild Orchid Crafts, the ribbon is from my LSS Arnolds.  I made the acetate butterfly... an update for these.... I have always used dimension magic to mix the glitter in and seal the staz on ink.  My LSS did not have any in stock, so I got some glossy accents thinking it would do the same trick.... It doesn't!!!! it is much thicker and cracks when you cut out the butterfly and fold up the wings. So I am sticking with the dimension magic!  The hearts are cut from a memory box die called precious hearts.  If you look closely among the flowers, I have glued in some diamontes.. the sparkle is gorgeous.  I buy cheap sew-on rhinestone buttons on ebay (the claw set ones) and remove the claw, leaving the bevel rhinestone to glue on.  Adds such a nice touch and if you buy in bulk, they really are a cheap way to add bling!


Thanks for stopping by. Stay safe XOX Tania


Tuesday, September 10, 2013

popcorn the Bear Fishing for Dad

Hi There. Its been such a long time since I have posted a card here... I've had my hands all little full :-) I managed to get quiet a few cards done before Amelia was born, so will try and get them uploaded as quick as I can.  Some may not have the colours or DP companies, but I hope they will give you some inspiration and ideas for some of your cards.

This one is one I did for Fathers day.  It is a Popcorn the Bear stamp of a bear and a duck fishing.  It is an adorable image, and you can have fun colouring wood grains and bear fur.  now, you all know how much I struggle with boys cards, but I had so much fun with this one!  I did it as a swing card, and used lots of old stuff I've had for ages from my scrapbooking days!  So, the shells, starfish and glass starfish all are seconhand from a cousins wedding table decorations! Yep, recycling at its best!  The fish are brads are leftovers I used on our honeymoon scrap page (we were married in 2003!) and the metal tiles were in my stash as well.  I used some gold pebble sand that I dont know where it came from years ago, and I have splashed around some dew drops in the water.  


Design Paper from a Prima Pad called Craftsman


copic colors:
YR 12, 15, 16
Y 35, 38
E 15, 19, 21, 23, 25, 29, 31, 33, 34
B 000, 14, 91
G 99
YG 03, 63
R 11, 20
N 1, 4, 6
100

Thanks for stopping by, Stay Safe XOX Tania

Thursday, September 5, 2013

box tutorial for cards

Hi there. A really quick post today with the tutorial for making boxes for square cards.  I thought I had a tutorial on this, but cant find it, so here it is:

You can adjust measurements to suit your cards.  Basically what you do is measure you card- I make my cards 14.8cm square ....  Add 4mm to this measurement.   This is going to be the base of your box.  I do my boxes 2.5cm or 1 inch deep, so you need to add this to the cardstock measurement X 2.  So in total you should have a 20.2cm piece of cardstock for the base box (that is 15.2cm + 2.5cm + 2.5cm).  Score each edge 2.5cm or 1 inch.  then score each little corner on the box diagonally (the first picture may best describe what I mean).  then it is a matter of gluing the corners in.  I find it helpful to fold up all the score lines before gluing and just hold the corners with a paper clip until the glue takes hold.  Do exactly the same technique for the lid EXCEPT add 0.3mm to the size of the cardstock... so you will have a piece of card 20.5cm square, scoring at 2.5cm or 1 inch around each side.  You need this extra little bit so the top sits over the base.

Take a look at the pictures below, they will be much more helpful in explaining how to make these boxes. If you have any questions, please drop me a message.

Stay safe XOX Tania


Monday, August 26, 2013

Please meet my newest masterpiece.... Baby Amelia


Good morning. Just letting you all know that I have not dropped off the face of the planet.... I have been creating a masterpiece of a different kind :-)

Please meet Amelia, our beautiful daughter we welcomed on the 20 August.  weighing 3130g she is absolutely perfect! The marks on her face are from forceps.  She is the most content wonderful little girl who will hopefully allow me some time to to keep crafting :-) I do have lots of cards done which I haven't uploaded yet, so stay tuned...


Thanks for stopping by. Stay Safe. XOX Tania


Wednesday, July 31, 2013

Penny Black Wishes for Kisses Christmas swing card


Good morning! a swing card today, using Penny Black's "wishes for kisses".  DP is by K&Co called Holly Vine Printed embossed. Flowers are from Wild orchid Crafts.  I have scattered some rhinestones around the flowers, added a handmade hat pin.  The ribbon is from my LSS Arnolds, and the adhesive rhinestone is by Queen & Co.  The swing part is cut using spellbinders labels four and the image is cut using spellbinders Gold Labels Four.


copics used:
N 1, 4, 6
E 000, 00, 42
B 000, 14, 91, 95, 97
G 09
YG 03, 97
R 00, 11, 20, 24, 27
YR 12

Flower soft was added to the scarf for added texture.


Thanks for stopping by, Take care XOX Tania


Friday, July 26, 2013

A christmas verse swing card


Hi there (again!)  I have gone with something a little bit different here by just using a sentiment and no image. The beautiful verse is by Verses Rubber stamps called "Magic of holidays" and I have silver embossed it.  I have used no DP here, instead using a cuttlebug embossing folder on white card - swiss dots. I have matted it with  purple glitter cardstock.  Now, one problem I encountered here is that the cuttlebug folders do not emboss a 15cm square card... so what I had to do for the inside was to emboss two pieces of card and hide the join under the ribbon! No one ever knows (unless you're a crafter lol)  I bought a new spellbinders die called elegant labels which I just had to use here... it does overhang the card a little, but still manages to fit in my boxes I make.  I glued the die cut to the glitter paper and handcut around the base... I guess you could use JAC paper in the same way and sprinkle the cut out parts with glitter too!  The flowers are Wild Orchid Crafts sprinkled with loads of glitter and I made the angel charm myself.  The little crystal and ribbon is from my LSS Arnolds Scrapbooking at Rothwell.

Here's my tip.... glitter paper is expensive and doesn't tend to glue anything to the top very well.  what I do is cut the matting (glitter) piece, then cut the centre out (so it looks like a frame)  the back of the glitter card glues perfectly to your base card, then you can stick you white  piece directly onto the actual card as well (I usually cut the frame about 1.5cm wide around... my top card goes over the top of the glitter paper to give a clean edge, but you can still stick the top piece directly onto the base card through the window section).  this way you can use the inside of the glitter window for things like snowflakes or butterflies etc. You could even "pop" up the top card onto some foam dots for dimension!


Wild Orchid Crafts is asking to see blue or purple, so would like to enter a second card into their challenge


Thanks for stopping by, Stay Safe XOX Tania